
There’s a pear tree in our backyard that I’m pretty sure nobody planted on purpose. It just showed up one year and decided to stay, and every September it dumps an absurd amount of fruit at our feet. The first few weeks we eat them straight off the branch. After that, I start getting creative pear pancakes, pear cake, pear salads with too much gorgonzola. And eventually, when I’m staring at yet another bowl of perfectly ripe pears wondering what to do, I make these preserves.

If you’ve ever had a friend hand you a jar of homemade preserves with a slightly smug smile, this is the recipe behind that smile.
Wait, what’s the difference between jam, jelly, and preserves?
Quick definitions before we dive in, because these words get tossed around interchangeably and they shouldn’t be.
Jelly is strained pure fruit juice cooked with sugar until it sets. Clear, smooth, nothing to chew.
Jam is fruit cooked down until it mostly falls apart, so you get a thick, spreadable texture with little soft bits throughout.
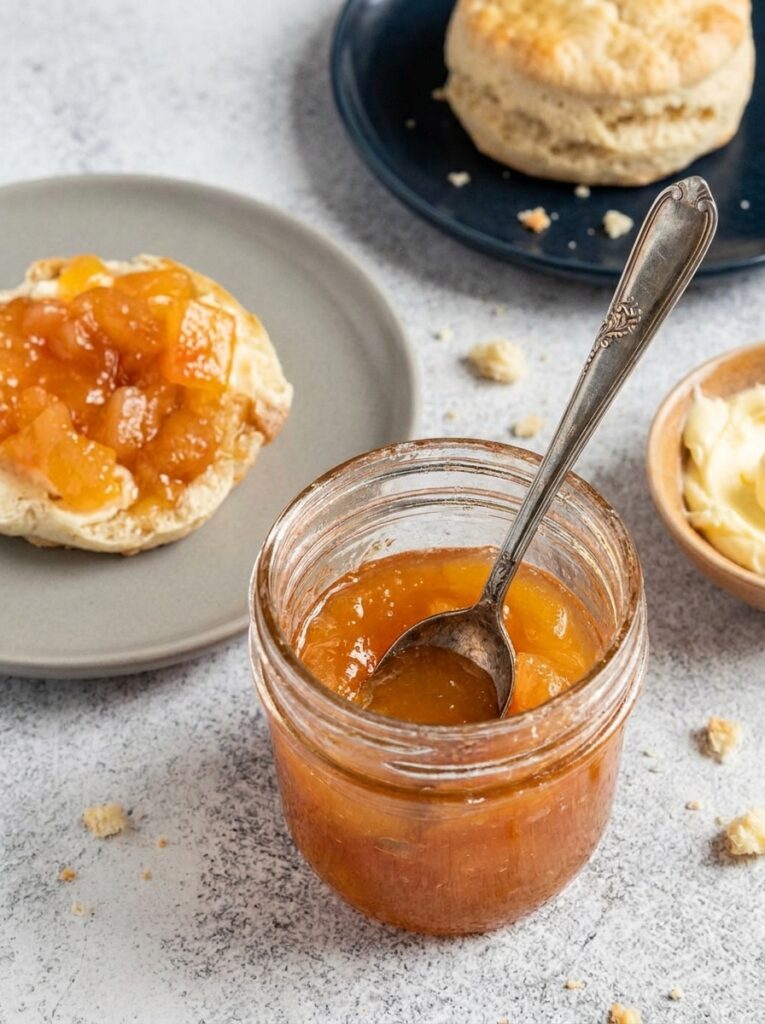
Preserves are the chunkiest of the three. You keep the fruit in big, recognizable pieces, suspended in a glossy syrup that sets up just enough to hold them in place. When you spread it on toast, you can still see what fruit it came from.
That’s what we’re making. Big, tender pieces of pear glistening in their own syrup.
What you’ll need
Nothing fancy. The whole recipe is basically four ingredients and time.
Pears about a dozen large ones or 16 small. Variety matters here:
- Bartlett, Anjou, or Comice will soften and partially break down, giving you a more cohesive preserve.
- Bosc holds its shape better — pick these if you want clearly defined chunks.
I usually use whatever I have, and honestly mixing varieties gives the best texture.
Granulated sugar 4 cups. I know that sounds like a lot. It is a lot. But sugar isn’t just for sweetness here, it’s the preservative. It’s what makes these jars shelf-stable. We’ll talk about whether you can reduce it in a minute (short answer: not really, if you’re canning).
Water — 2 cups. Even juicy pears need a little help getting the syrup going.
Lemon juice — 3 tablespoons. This does two jobs: brightens the sweetness so it doesn’t taste flat, and bumps up the acidity to keep things safe in the jar.
The method
This is genuinely one of the easiest preserving recipes out there. There’s no pectin to fuss with, no thermometer to babysit. You’re basically just simmering fruit in syrup until it looks right.
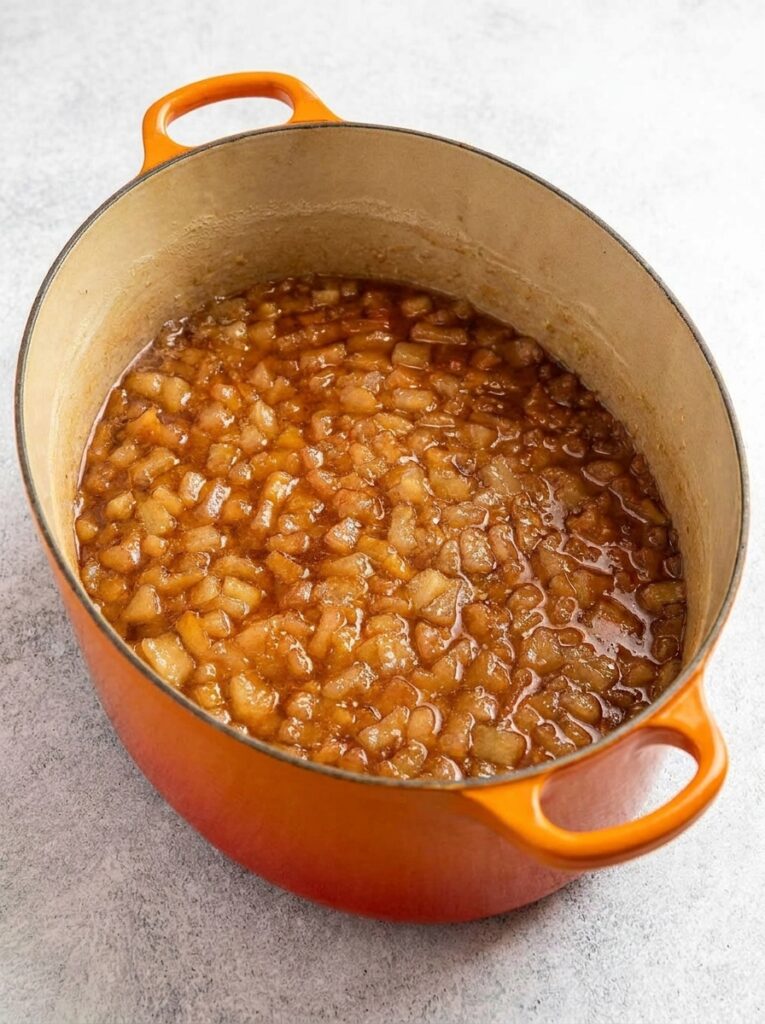
Step 1 Cook it down. Peel and slice the pears. Toss them in a heavy stockpot with the sugar, water, and lemon juice. Bring it to a boil, then drop it to a gentle simmer.
Now leave it alone for a while. You’re looking at 1½ to 2 hours of slow cooking, uncovered. Stir occasionally so nothing scorches on the bottom, but mostly let it do its thing. The kitchen will start smelling incredible after about 30 minutes.
You’ll know it’s ready when the syrup has thickened and a spoonful dragged across a cold plate holds its shape instead of running. The pears should be translucent and soft but still in pieces.
Step 2 Jar it up. Have seven hot half-pint jars ready (running them through the dishwasher right before works great). Ladle the hot preserves in, leaving about ¼ inch of space at the top. Run a clean knife or chopstick down the inside of each jar to release any air bubbles, then wipe the rims with a clean damp cloth — even a sticky speck can mess up the seal.
Center the lids, screw on the bands until they’re “fingertip tight.” Don’t crank them.
Step 3 Process the jars. Lower the jars into a water bath canner, making sure they’re covered by at least an inch of water. Bring it to a rolling boil and process for 10 minutes.
Pull the jars out (use a jar lifter — burned fingers are not part of the romance of preserving) and set them on a towel to cool undisturbed for 24 hours.
You’ll hear the lids pop as they seal. It’s the most satisfying sound in home cooking.
How to tell if your jars sealed properly
After they’ve cooled, press down on the center of each lid. If it doesn’t flex or click, you’ve got a good seal. If it pops up and down like a button that one goes in the fridge for the next couple of weeks.
Remove the metal bands before storing. This sounds counterintuitive, but trapped moisture under the bands can corrode them, and worse, a band can hold a failed lid in place so you don’t notice the seal broke. Bare jars tell the truth.
Skip the canning altogether?
Totally fine. If the water bath process feels like more than you signed up for, just pour the cooled preserves into clean jars or freezer containers. They’ll keep about 3 weeks in the fridge or up to a year in the freezer. Leave about ½ inch of headspace in freezer containers so they don’t crack.
Ways to make it your own
Once you’ve made the base recipe, it’s hard not to start tinkering. Some directions I love:
- Vanilla pear — split a vanilla bean and toss it in while it cooks (or stir in a teaspoon of vanilla extract at the end). Tastes like a fancy bakery.
- Spiced pear — add a cinnamon stick, a star anise, or a few whole allspice berries during cooking. Use whole spices, not ground — they infuse the flavor without making the preserves cloudy.
- Pear and ginger — slice a thumb of fresh ginger and let it simmer with the pears. Discard before jarring, or pop a slice into each jar for a little kick.
- Pear with bourbon — stir in a tablespoon at the end. Adults only, obviously.
A few honest tips
Don’t mess with the sugar if you’re canning. I know low-sugar versions are tempting, but reducing the sugar changes the acidity and shelf-stability math. If you’re going to fridge or freeze it, you can dial it back. If it’s getting canned, leave the recipe alone.
Fresh lemon juice is fine here. Some canning books are strict about bottled lemon juice for consistent acidity, but pears already fall on the safe side of the pH scale, so fresh works.
Halving the recipe works. Just watch it more closely smaller batches scorch faster. You’ll probably need a bit less cooking time too.
How long it keeps
Properly canned and sealed, these will last up to two years in a cool, dark cupboard. For the prettiest color and freshest flavor though, eat them within the first year. Once opened, refrigerate and use within about three weeks.
Ways to actually use them
This is the part most preserves recipes skip. You’ve got seven jars now — what do you do with them?
- Swirled into plain Greek yogurt with some toasted nuts on top
- Spread on a turkey or ham sandwich with a slice of sharp cheddar
- Spooned over warm pancakes or thick French toast
- Dolloped on a cheese board next to brie or blue cheese
- Stirred into oatmeal
- Glazed over roast pork or chicken in the last 10 minutes of cooking
- Given away in little jars with a ribbon the easiest “I made this” gift in existence
Make these once, label the jars with the date, and tuck most of them into the back of the cupboard. Then, on some grey morning in February when fresh fruit feels like a memory, open one. It’ll taste like the day you made it. That’s the whole point.


Leave a Comment