
A centerpiece Thanksgiving roast turkey is the crowning jewel of the holiday table, yet it strikes dread into even seasoned home cooks. Will the breast dry out into sawdust before the thighs finish cooking? Will the skin turn out pale and rubbery? We have all sat at a Thanksgiving feast waiting anxiously while someone slices into an overcooked, flavorless bird that desperately relies on gallons of gravy for moisture.

Here is the culinary truth: achieving an exceptionally juicy, deeply seasoned roast turkey with crackling, paper-thin golden-mahogany skin is not about luck—it is pure culinary science. By pairing an effortless 24-hour refrigerator dry brine with a rich, aromatic garlic herb compound butter massaged directly beneath the skin, you ensure that every slice of breast and dark meat stays intensely succulent, savory, and scented with rosemary, thyme, and sage.
Why This Foolproof Roast Turkey Recipe Works
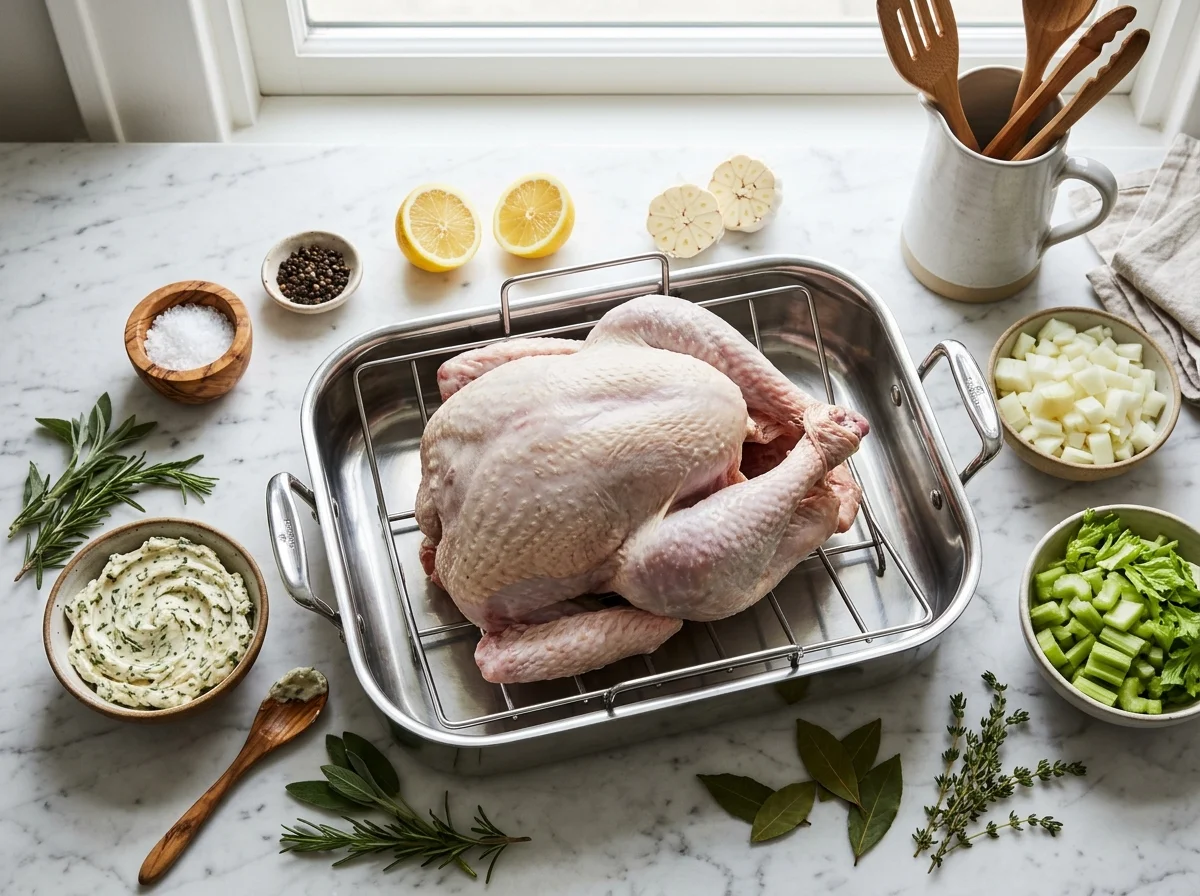
- The 24-Hour Dry Brine: Unlike messy, soggy wet brines in giant coolers of salt water, dry brining uses kosher salt to draw out natural meat juices, dissolve them, and draw them deep back into the muscle fibers through osmosis. Furthermore, sitting uncovered in the refrigerator air-dries the skin so it bakes into ultra-crisp perfection.
- Herb Butter Under the Skin: Placing garlic herb butter directly onto the meat creates a thermal shield that gently bastes the delicate breast while infusing rich aromatics right where flavor matters most.
- Aromatics in the Cavity: Instead of packing heavy bread stuffing inside the cavity (which delays cooking and dries out the bird), stuffing with halved garlic heads, fresh citrus, and herbs seasons the bird from the inside out through aromatic steam. Pair it with our Classic Thanksgiving Herb Stuffing baked separately in a casserole dish.
- Low & Steady Roasting: Roasting at 325°F (165°C) cooks the turkey evenly without scorching the skin or shocking the muscle fibers into tightening and expelling moisture.
The Science of Dry Brining vs. Wet Brining
For decades, food magazines preached the wet brine gospel: submerging a 14-pound turkey in a five-gallon bucket filled with salt water, sugar, and ice. While wet brining does add moisture, food scientists have proven that the liquid added is merely bland tap water, which dilutes the natural, concentrated turkey flavor and leaves the skin rubbery and sponge-like.
Dry brining is vastly superior in every way:
- Concentrated Flavor: You season only with salt and spices. The meat absorbs its own seasoned juices without absorbing diluting water.
- Porous, Crisp Skin: Refrigerator air acts as a natural dehumidifier. As the salt pulls moisture from the surface and draws it inside, the surface skin dries out completely, priming it for blistering oven crispiness.
- Zero Kitchen Mess: No lugging sloshing buckets of raw poultry water across your kitchen floors or hunting for refrigerator shelf space.
Step-by-Step Culinary Keys to Success
1. Loosening the Skin & Applying the Compound Butter
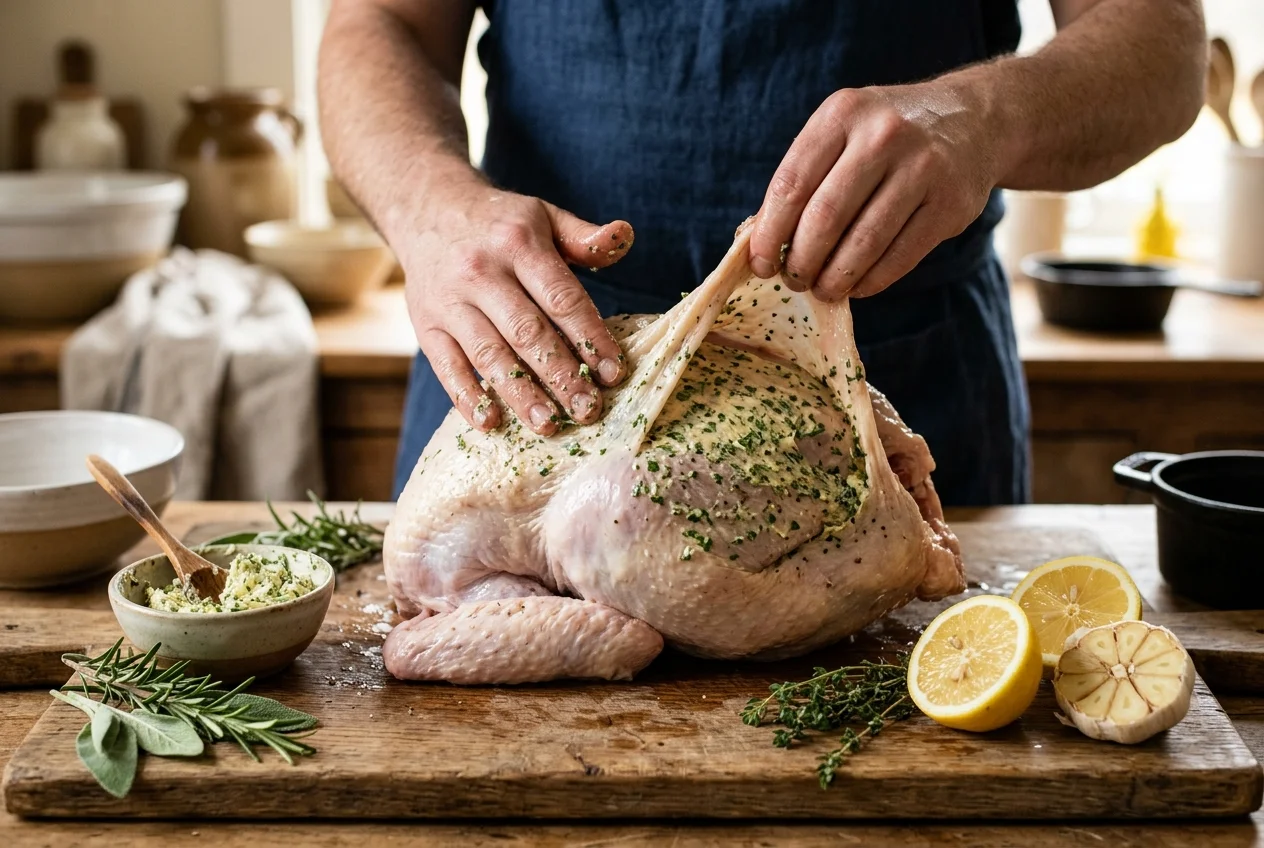
The key to juicy breast meat is getting the garlic, rosemary, thyme, sage, and lemon zest butter directly against the raw flesh. Start at the neck cavity and gently slide your fingers between the transparent skin and the breast meat. Wiggle your fingers gently downward toward the drumstick joints without puncturing the skin. Massage roughly two-thirds of your whipped herb butter across the meat, then smooth the skin back down and rub the remainder over the surface.
2. The Lower-Third Oven Position
A 12 to 14-pound bird sits tall. If placed in the center of the oven, the top breast skin will sit too close to the upper heating elements, burning long before the dark meat reaches safe temperatures. Always lower your oven rack to the lower-third position so heat circulates evenly around the entire bird.
3. Liquid in the Roasting Pan
Pour 2 cups of chicken or turkey broth into the bottom of the roasting pan beneath the wire v-rack. This serves two vital purposes: it prevents dripping turkey fat from smoking and burning in the pan, and it captures aromatic browned juices that will form the luxurious base for your homemade gravy.
4. Knowing Exact Doneness: Ditch the Pop-Up Timer
Never rely on the cheap plastic red timer pre-inserted into commercial turkeys. Those timers are calibrated to pop between 180°F and 185°F—temperatures that guarantee dry, chalky meat. Instead, rely on a dependable digital instant-read thermometer:
- Thigh Doneness: Insert probe into the thickest part of the inner thigh (without hitting bone). It should register 165°F (74°C).
- Breast Doneness: Insert probe into the center of the thickest part of the breast. Pull the bird when the breast hits 160°F (71°C). During the 30-minute rest, carryover cooking will naturally elevate the breast to a perfectly food-safe 165°F while locking in precious juices.

How to Carve a Turkey Like a Professional Chef
Forget slicing delicate paper-thin shavings directly off the bird at the dinner table. Professional chefs carve turkeys on a sturdy cutting board in four methodical steps:
- Remove the Legs & Thighs: Slice through the skin connecting the leg to the breast. Pop the hip joint backward until it clicks, then cut cleanly through the joint. Separate the drumsticks from the thighs.
- Remove the Wings: Pull the wing tip outward and slice through the ball-and-socket shoulder joint.
- Carve the Whole Breast Lobes Off: Instead of shaving downwards, place your chef knife alongside the central breastbone and make long, smooth cuts following the contour of the ribcage down to the wing socket until the entire breast lobe comes off in one magnificent piece.
- Slice Across the Grain: Transfer the breast lobe to your cutting board and cut across the grain into thick, 1/2-inch succulent medallions. Every single slice will boast a crisp crown of herb-buttered skin and maximum juiciness!
The Complete Thanksgiving Feast Pairing Guide
No roast turkey stands alone. Build an unforgettable Thanksgiving holiday menu by pairing this centerpiece with our heirloom recipes:
- The Essential Stuffing: Bake our Classic Thanksgiving Herb Stuffing alongside the turkey for golden crust and aromatic celery-sage goodness.
- Sweet & Savory Sides: Serve rich, velvety spoonfuls of Southern Sweet Potato Casserole and creamy Classic Southern Corn Casserole.
- The Green Vegetable: No table is complete without bubbly Classic Green Bean Casserole topped with crispy fried onions.
- Tart Bright Balance: Balance rich savory gravy with a bright spoonful of Easy Homemade Fresh Cranberry Sauce with orange zest.
- Showstopping Desserts: Finish your holiday dinner with a slice of Classic Homemade Pumpkin Pie, gooey Southern Pecan Pie, or our decadent Spiced Pumpkin Cheesecake.
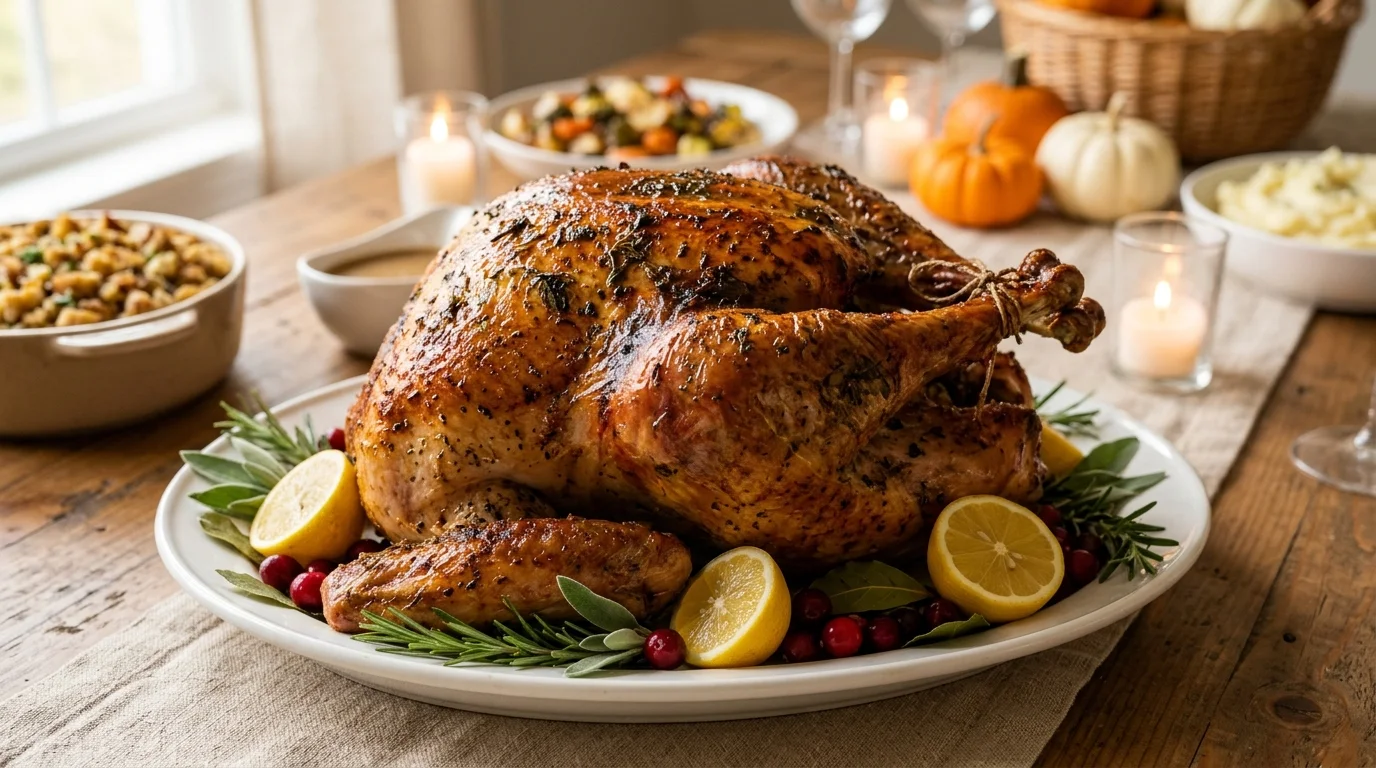
Juicy Garlic Herb Roast Turkey Recipe (Golden & Tender)
Ingredients
Method
- 12 to 24 hours prior to roasting, remove the completely thawed turkey from its packaging. Discard the neck and giblets (or reserve for homemade stock). Thoroughly pat the turkey dry inside and out with heavy paper towels.
- Generously sprinkle kosher salt and freshly cracked black pepper all over the skin, inside the cavity, and along the thighs and wings. Set the turkey breast-side up on a sturdy wire v-rack inside a large roasting pan.
- Transfer the roasting pan uncovered into the refrigerator for 12 to 24 hours. The circulating dry air dehydrates the skin to guarantee paper-crisp results while salt diffuses deep into the meat cells to retain tenderness.
- Remove the turkey from the refrigerator 45 to 60 minutes before roasting so it comes closer to room temperature for even cooking.
- In a medium mixing bowl, mash the softened butter, minced garlic, chopped rosemary, thyme, sage, lemon zest, smoked paprika, salt, and black pepper until completely smooth and aromatic.
- Starting at the neck cavity, gently wiggle your fingers between the breast skin and the meat, separating the membrane without tearing the skin. Spread roughly two-thirds of the garlic herb compound butter directly against the breast and thigh meat underneath the skin. Rub the remaining butter all over the exterior skin.
- Stuff the cavity loosely with onion quarters, halved garlic head, lemon halves, and herb sprigs. Tuck the wing tips behind the shoulders and tie the drumstick ends together with kitchen butcher twine.
- Position the oven rack in the lower third and preheat oven to 325°F (165°C). Pour 2 cups of chicken or turkey broth into the bottom of the roasting pan beneath the wire rack.
- Roast uncovered for approximately 2 hours and 45 minutes to 3 hours and 15 minutes (roughly 13-15 minutes per pound for an unstuffed turkey). If the breast browns to a deep golden mahogany before the 2.5-hour mark, tent loosely with a sheet of aluminum foil.
- Check internal temperature at the 2.5-hour mark with an instant-read probe thermometer inserted into the thickest part of the inner thigh (avoiding bone). Pull the turkey when the thigh registers 165°F (74°C) and the thickest portion of the breast hits 160°F (71°C) — carryover heat during resting will finish the breast to a safe, juicy 165°F.
- Carefully transfer the roasted turkey to a large carving board with a juice moat. Tent loosely with foil and let it rest undisturbed for 30 to 45 minutes. (Crucial: slicing too early forces boiling juices to flood the cutting board instead of staying in the meat!).
- Pour all pan drippings through a fine-mesh sieve into a fat separator to make rich turkey gravy. Carve off the breast lobes whole, then slice crosswise against the grain into succulent slices. Serve warm with stuffing, gravy, and cranberry sauce.
Notes
• The Power of Dry Brining: Leaving the salted turkey uncovered in the fridge for 24 hours draws out moisture, dissolves the salt into natural brine, reabsorbs it deeply into the muscle tissue, and dehydrates the skin for unbeatable crispiness.
• Never Trust the Pop-up Timer: Plastic pop-up timers often trigger at 180°F+, resulting in dry, sawdust-like breast meat. Use a digital instant-read thermometer.

Leave a Comment